In this article, I will express my view, how to make a good landscape photograph and later describe in more detail, how I get the desired result on one of my photos.
The vast majority will already know what is written here , but mybe , it will help someone to take better pictures.
The vast majority of top landscape photographers say, that pre preparation helps you a great deal to improve your photographs. Scouting the locations, prior to the photoshoot, is the best way, to achive that. If it is possible, I do that myself. Scouting saves you valuable time and unnecessary rush, when you go back later to take the shoots, because your mind is already made up about the composition and you already have the idea, what kind of photo you want to take, so you can focus on the technical details istead.
Now to one of my photos, and how I do it.
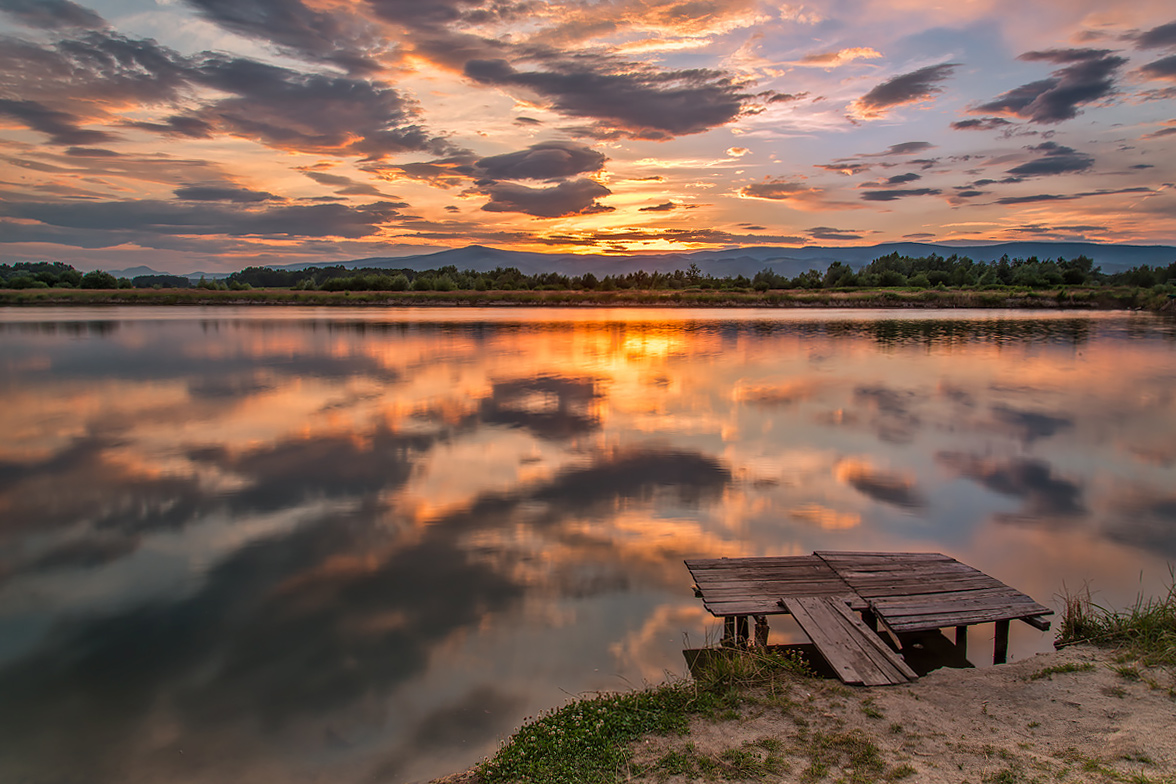
I had plans to take photos at Pragersko ponds for quite some time. I went for location scouting the day before. After about an hour of searching and driving around I found the location, I walked around a little “and shoot” test photos with my mobile phone. When I returned the next day, I only needed some luck with the weather, witch I got. :)
For all of my landscape photos I use sturdy tripod (for more info what I have check the menu GEAR), Graduated LEE filter, attached in front of the lens with holder that mounts on the filter screw of the lens . I also use wired remote, because the shutter speeds, in most cases, are too slow, for sharp photos. Alternatively you can use built-in self-timer.
Once everything is mounted onto the camera, it looks something like that:
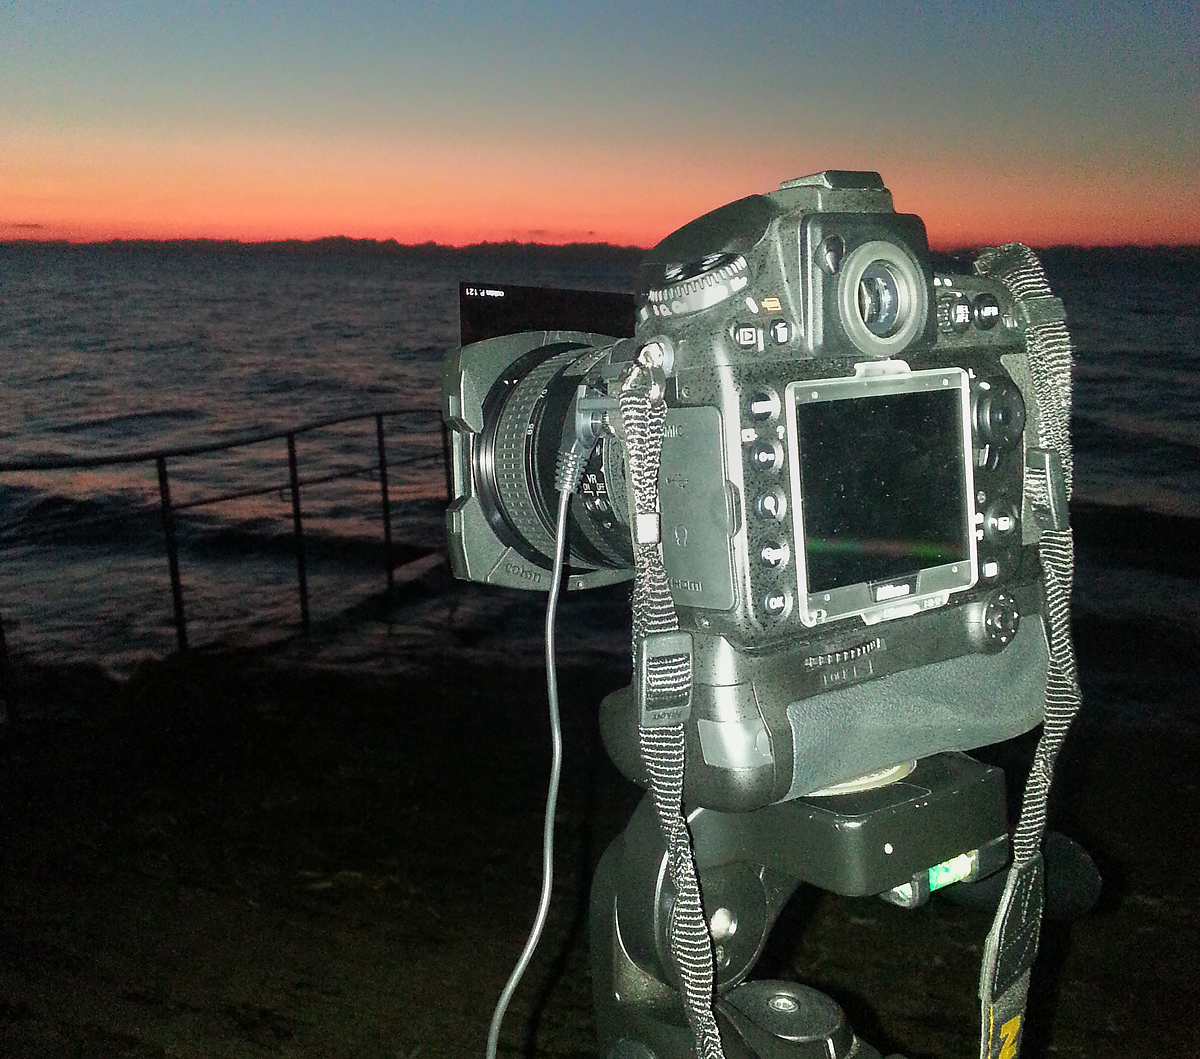
Mounted ND filter allows me, to retain the details in the brightest parts of the photo, which in most cases is the sky, because without the filter sky would be overexposed and the photo unusable. This way, I get a evenly exposed shot, with such shot it's easy to work in post processing.
When things are mounted and camera is ready, I start shooting pictures. I work the scene in all possible angles, which location allows. I use the camera in manual ( -) mode with the aperture settings from F11 to F22, so that the entire photo is sharp. I set ISO to the lowest possible setting, in my case 100. When I see , that the light is too low or. that I have exhausted all possibilities on my location, I stop shooting.
Photos on my computer are then imported into Lightroom and I start post processing.
This is how the RAW image looks directly from the camera. The red warning spots in lightroom, despite the filter, still show the overexposed parts of the sky, which can easily be corected later, and would not be possible, if I would shoot without a filter.

I got the desired look in lightroom with this, corrections.
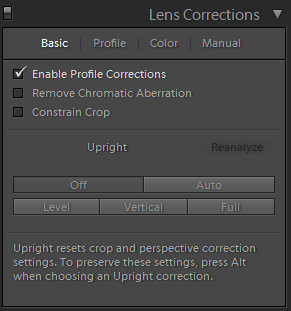
First I croped and straighten the photo using a crop tool and the lens correction panel. In Iens correction panel I used default settings, offered by Lightroom..
Next I corrected white balance (-), main exposure (-), added contrast, reduced the highlights (highlights), and opened up shadows (-). In most cases I increase clarity for more details and vibrance for more vibrant colors.

For me, a very important part is editing individual colors in the HSL panel, there I adjust luminace (-) and saturation (-) of colors, which are important for sunrise and sunsets. These are orange, yellow and blue. Most of the time I leave all other colors alone.

In the end I added some warm tones to the highlights (highlights) and shadows (-) in the split toning panel. Here I always try multiple settings, to get the desired look.

I leave detail panel for sharpening on default settings.
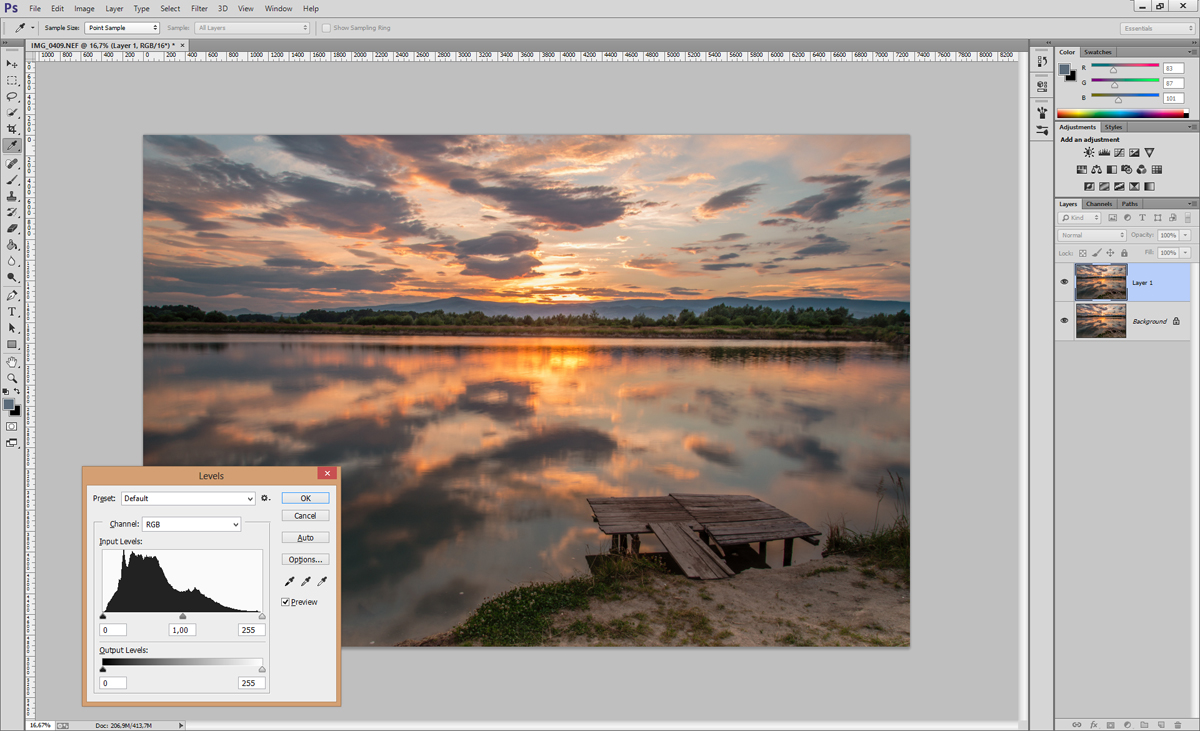
Then the photo is exported into photoshop.
First steps in Photoshop are final straithening and croping with crop tool to get the desired composition. This is followed by “cleaning” with heal brush in content aware mode, where I remove unwanted parts such as power lines, sticks, trash…
Followed by selective lighting processing with Adobe Camera Raw Filter.
The last step is sharpening of the photo.
I use smart sharpen filter. For high resolution photos (for print, etc.) the settings are:
– amount set around 130%;
– radius 2.0 px;
– Reduce noise (only photoshop CC and above) I leave it around 6%;
– remove is set to Lens blur.
All settings are a matter of your taste, and are also dependent on noise and other factors.

I then resise the image to 1200px on long side, for internet publishing and sharpen with this settings:
– amount about 90%;
– radius is only 0.3 px;
– Reduce noise 6% (photoshop CC and above):
– remove remains on Lens blur.
These settings are also a matter of your taste, and vary from photo to photo.
Here is the final image. :)